|
|
|


Layout |
|
|
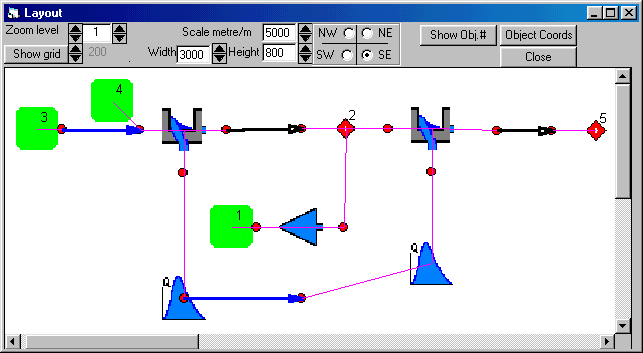
The Layout command provides a visual display of the elements added to the drainage network. The procedure is carried out automatically in MIDUSS and Catchments, Pipes, Channels and other stormwater control devices are drawn on the Layout as they are designed.
It is important to understand the concept behind the layout
system provided in MIDUSS. You Adding (and deleting) of icons representing design elements is done using the hydrology and hydraulic design commands of the MIDUSS main menu. The MIDUSS design philosophy proposes that it is best to design and optimize one drainage element at a time as you progress downstream. If the graphical depiction of the network was to be performed first, with element optimization done after, then you would be faced with trying to optimize many different elements at the same time thus reducing your productivity and the quality of the design.
The design procedure used by MIDUSS requires that you start from
the furthest upstream point in any branch of the drainage
network and work downstream generating flows and designing
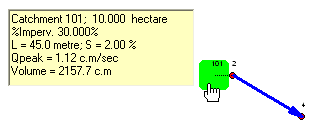
You can plot the layout in a any of four directions NE, SE, NW or SW. You can zoom in out out and adjust scaling. A grid can be superimposed. A layout popup menu includes a View mode which will display a drainage element's design and performance data when you hover over a network element.
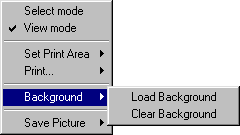
When the Layout window is displayed you can click your mouse
right button to open up a menu used just for interaction with
the layout information.
|
|
|
|
|
|
(c) Copyright 1984-2023 Alan A. Smith Inc. |
|
|
|